The key success to printing with our MetalFil™ – Ancient Bronze or Classic Copper lies not in the printing of the filaments themselves but in the after treatments that are possible. So in this post we are going to dive into the world of patina’s, acids and (household) chemicals that you can use to give that awesome MetalFil™ print an artists touch.
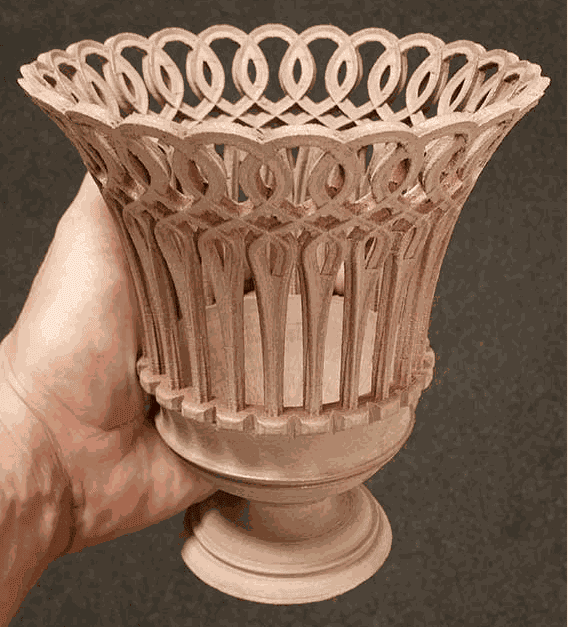
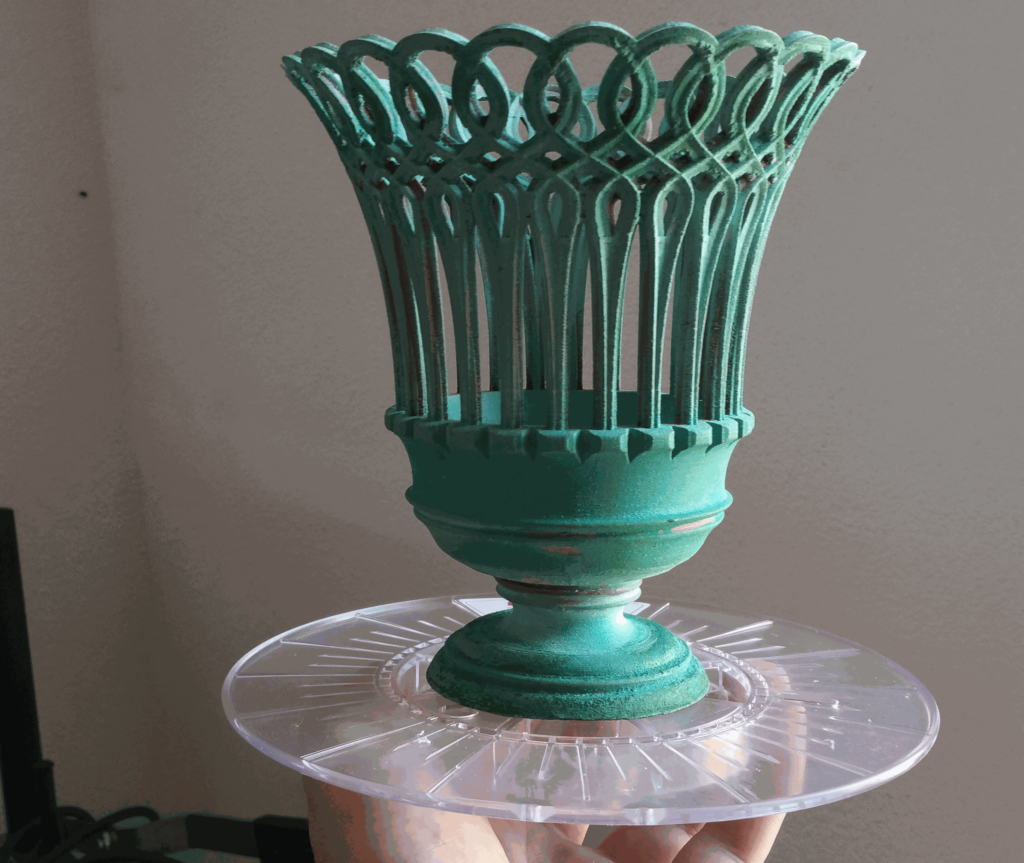
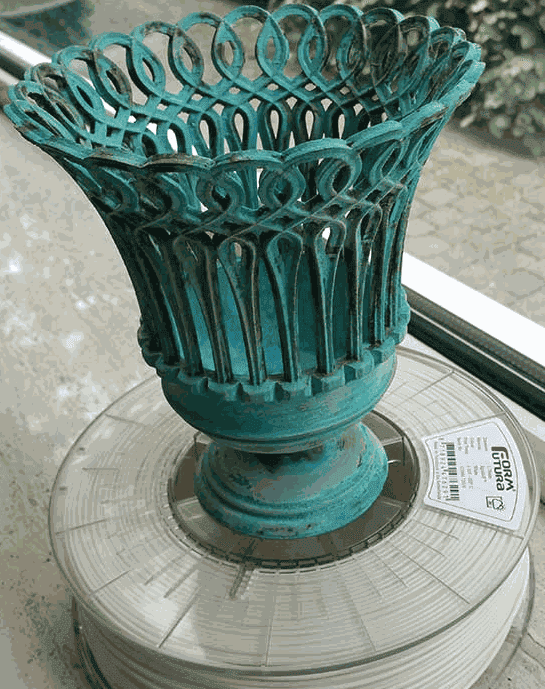
But we are not going to forget about the printing involved off course, so we will be sharing the Simplify3D settings we have used. We selected the amazing XVII century Porcelain Vase by ITALYmaker to be printed in this blogpost. The original can be found at the Palazzo dei Normanni in Palermo, Italy where its part of the Kings collection. We selected this vase due to its style but also its difficulties like large amount of retractions, overhang and curves typically not possible with traditional copper filaments.
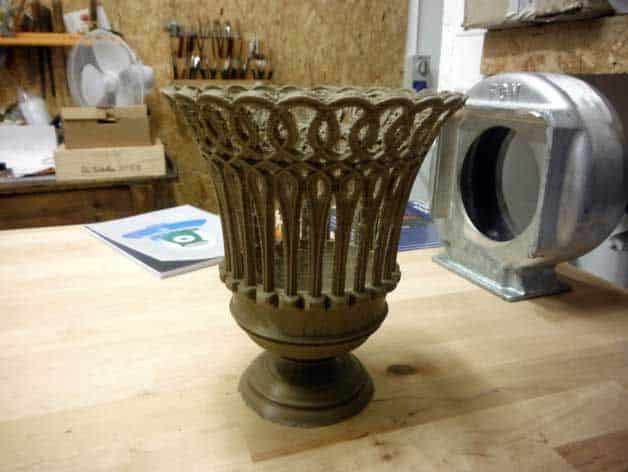
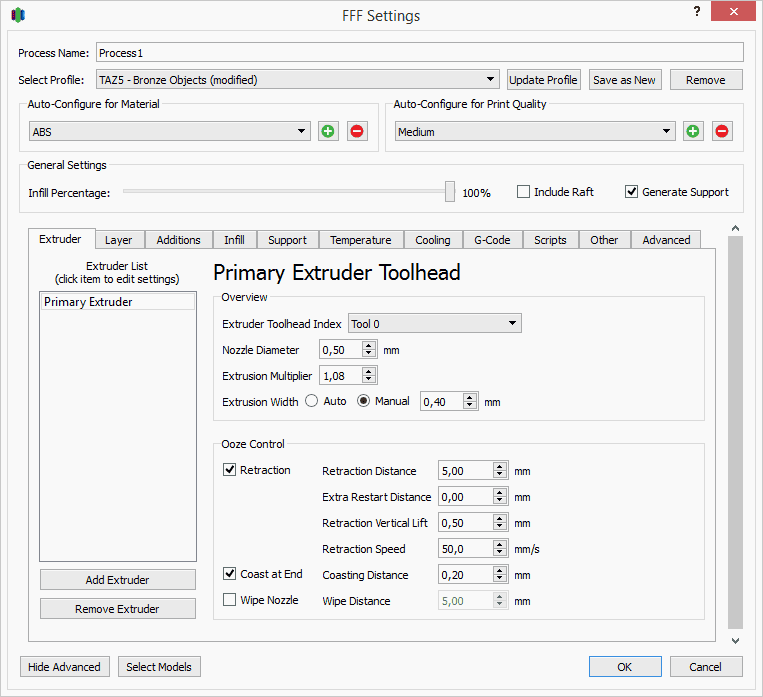
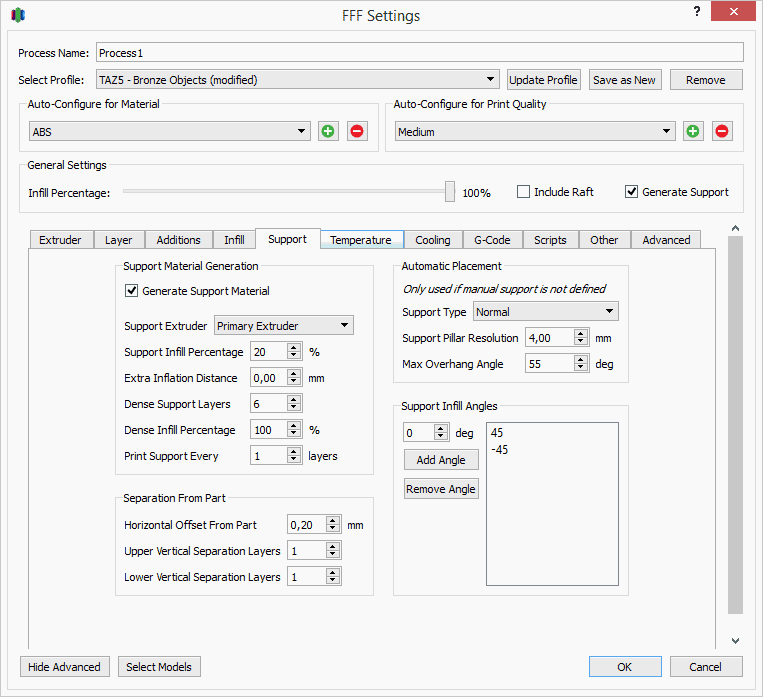
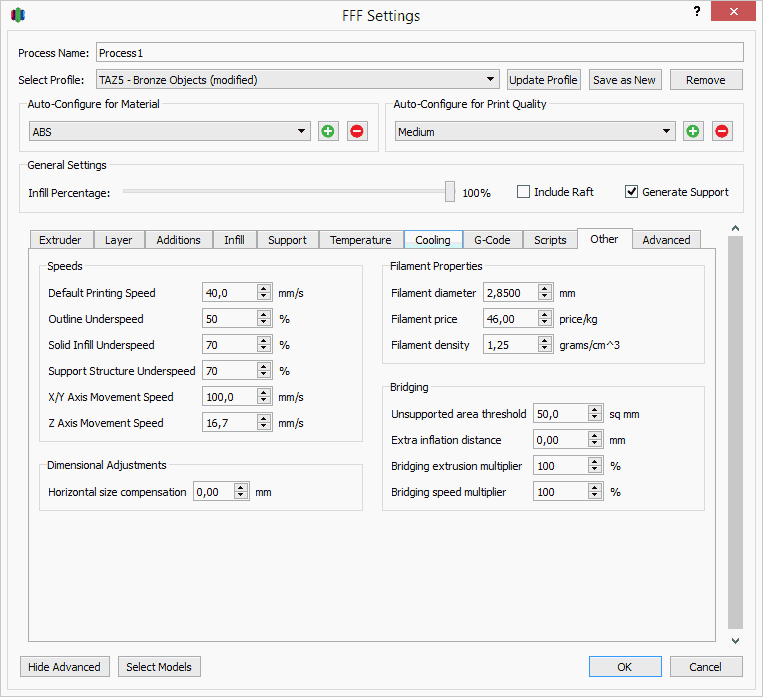
The Vase was wirecut into two pieces and printed on a TAZ5 single extruder printer with the build plate at 60 degrees Celsius. The Filament we used was our 2.85mm MetalFil™ – Classic Copper with layer height set at 0.15mm, nozzle temperature at 220 degrees Celsius and it took almost 43 hours @40mm/s (Simplify3D screenshots can be found at the end of this post).
*Original print by ITALYmaker (http://www.thingiverse.com/thing:676132)
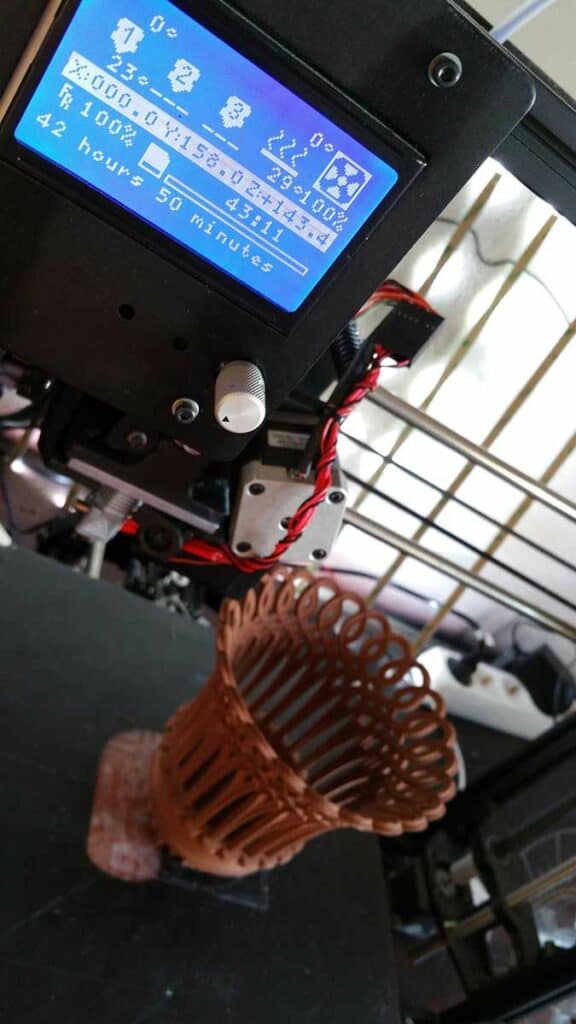
When printing abrasive filaments like copper, bronze, carbon, or glow in the dark you want to take care in selecting the proper nozzles. Brass is softer then copper and the nozzle will wear out quick as visible at the last few centimetres of the print. The nozzle diameter (by our guess) was more like 0.65 then the original 0.5mm resulting in slight blobs and zits. These are easily cleaned up though. If you want to print with consistent quality get yourself a stainless steel or wear resistant nozzle.
Polish it up
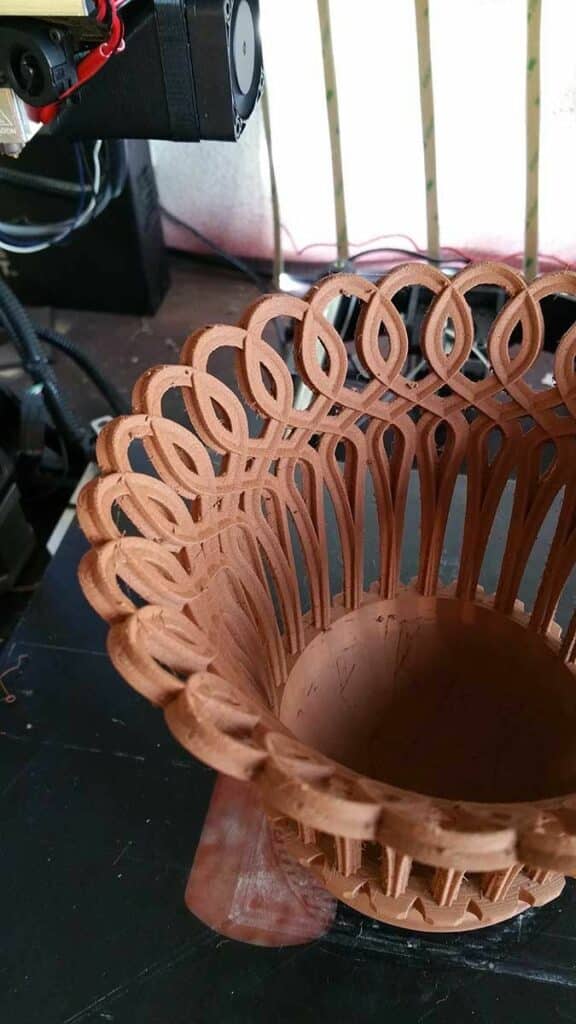
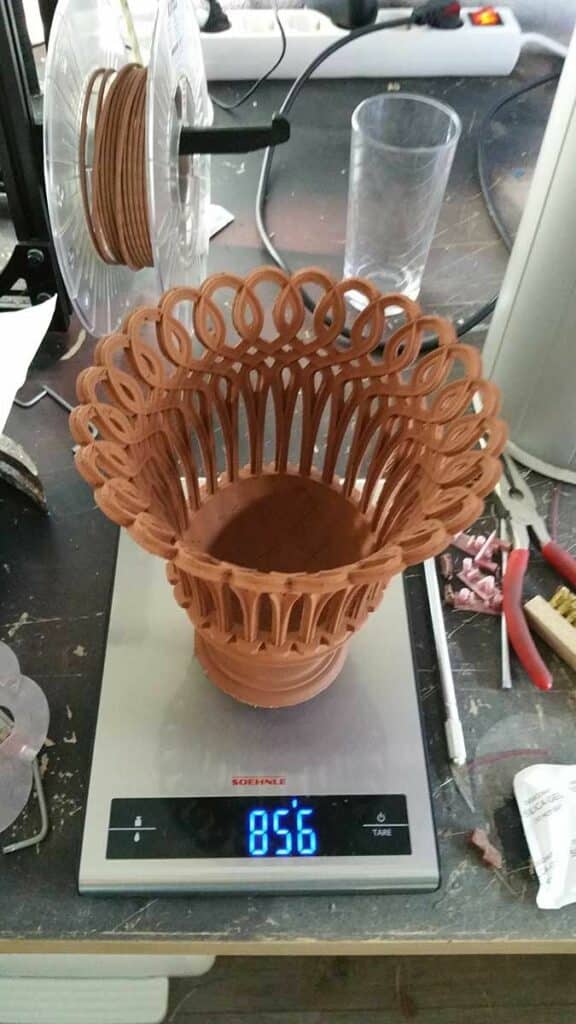
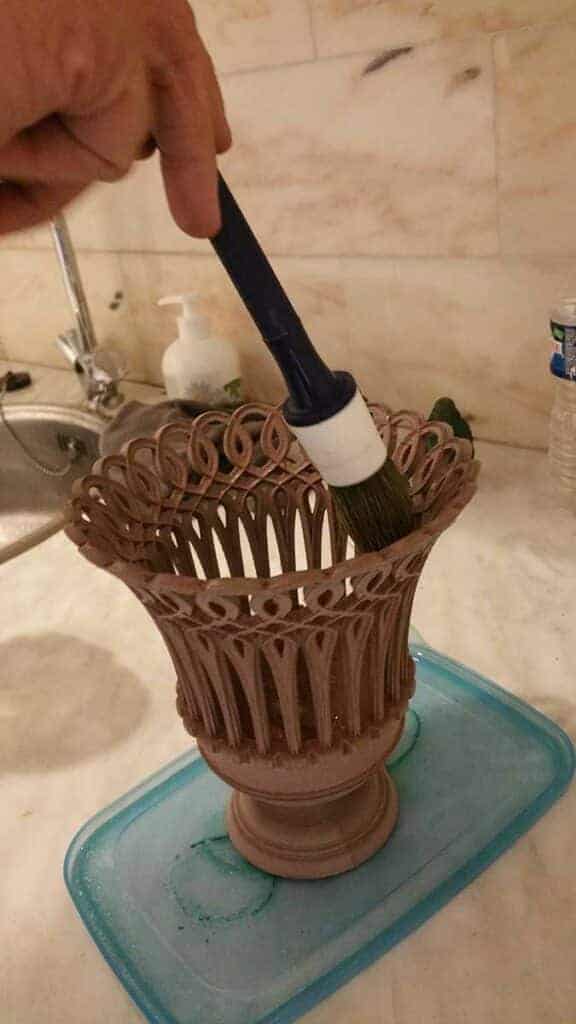
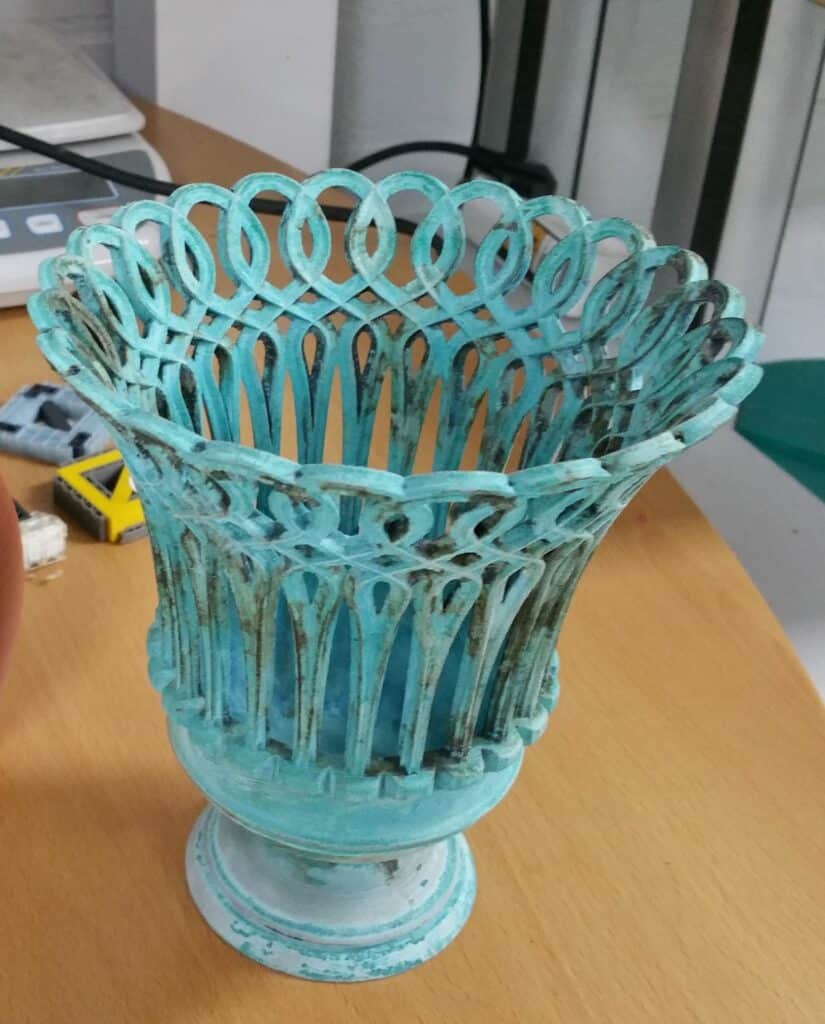
So now we have the print. It’s time to do some clean-up. Take a SOFT brass brush and clean up the small bits and pieces. Make sure you brush every part as this process is not only for getting rid of small pieces but also to expose the copper particles in the filament so they respond to the chemicals better. The finished piece should look like this.
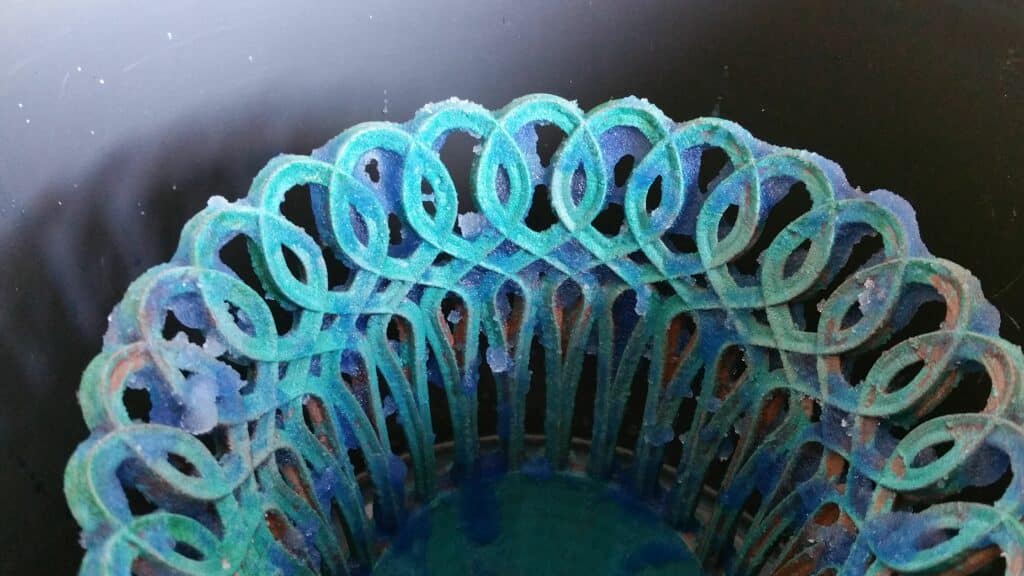
For our piece we wanted to go for an old black/blue patina, which can be done quite easily.
Recipe for this patina
- Soldering fluid
- Soda
- Ammonia
*Please take care with these chemicals (as you should with all patina chemicals) Use gloves, protective eye gear and a well ventilated room or you can cause damage to yourself.
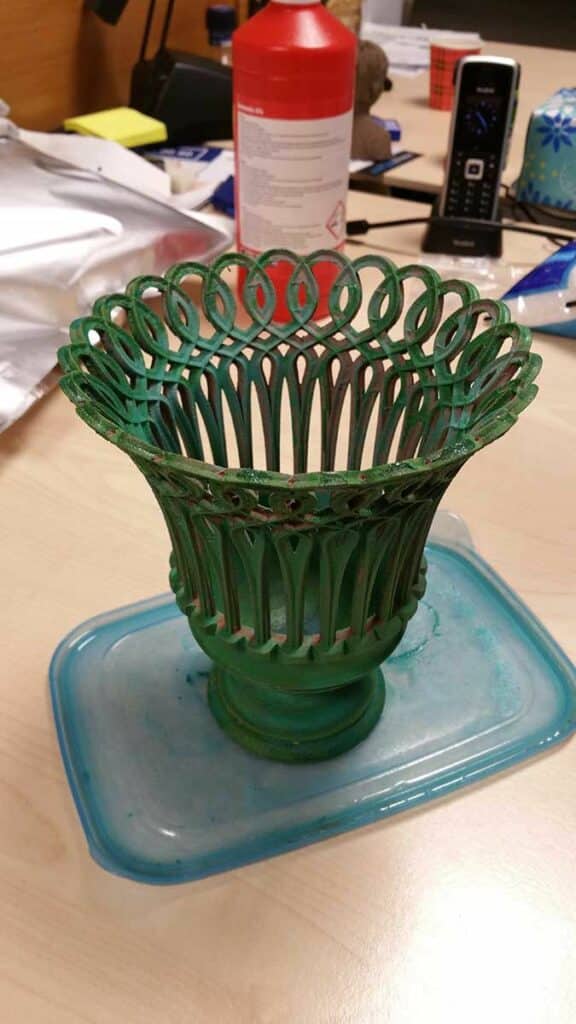
This patina works amazingly well and fast. Just make sure you get all the curves and shapes evenly and don’t miss anything.
But we were going for a more blueish/black patina so we continued with the next step.
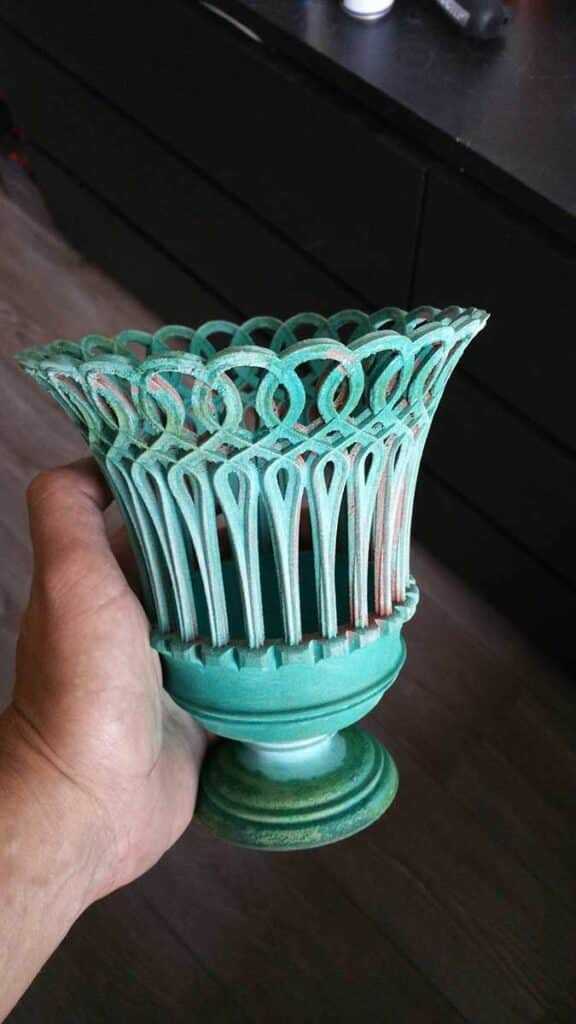
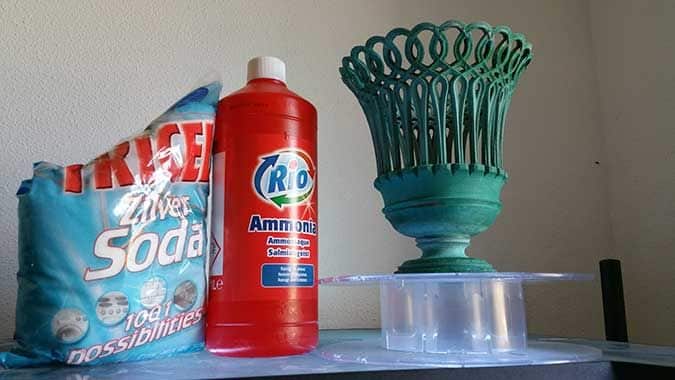
The Soda/Ammonia treatment
- Soda
- Ammonia (3 to 4%)
- Empty filament spool
- Long drink glass
- Fine brush
- Plastic Bucket
- Something to cover the bucket with (we used a 3mm MDF wood board)
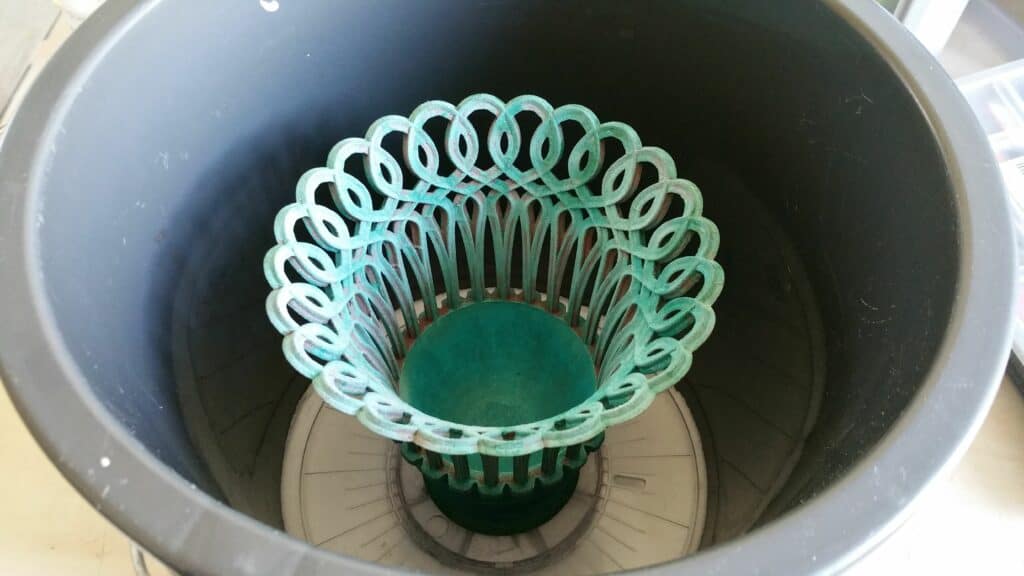
Pour as much of the bottle of ammonia in the bucket to fill it up just under the vase itself. Then close the bucket off with the MDF board and leave it alone for 8 hours.
Please refrain from looking into the bucket before its finished. The fumes are what’s colouring the vase and letting them escape will only make the process take longer. Also you want to take special care when opening the bucket after the 8 hours. The smell is so bad …
Take the brass brush and clean the excess ammonia off the vase and repeat the procedure for a deeper blue if you like. Then put on a layer of wax or clear varnish to seal the colour when it is to your liking and presto .. its finished.
Final thoughts:
There are as many Patinas as there are artists and even more methods of putting on patinas. This is our method we tried (to be honest) for the first time. We think it’s a success and it shows how much you can change appearance of your MetalFil™ print with some simple household products. We will be continuing this journey and report back in when we have found something new and exciting.
Happy printing!
Additional information:
http://www.sciencecompany.com/Patina-Formulas-for-Brass-Bronze-and-Copper.aspx
http://jewelrymakingjournal.com/easy-patina-finishes-for-copper-and-brass/
The Simplify3D settings we used for the XVII Porcelain Vase print:
Screenshots of our Simplify3D settings: